Creative StrategiesThroughout the semester I have thoroughly enjoyed creating things almost every week. It's something that I always wish that I could do more often, and this class helped me to allocate time towards creating things. Before taking this class I had the understanding that creativity was the same as making things, but I have learned that creativity comes in so many other forms. One of the my favorite strategies we learned (regarding things other than making) was the Try Ten Questions method, described by Sawyer in Chapter 1 of Zig Zag. I found this method quite helpful to come upon different perspectives on a problem. Looking at a problem from multiple perspectives is a great way to make a plan of approach or even find a new approach when something else did not work out. The important part about the method is that it can be difficult to reframe the same question 10 times, so as you do it you tend to stray a little from the original question. As you stray away from the question I think it helps to shift the focus all over and makes you start to think outside the box.
Along the same lines another creativity approach I enjoyed was ideation. I always find this exercise exciting! I think it's great to throw out as many ideas as you can to practice creativity. Something that resinated with me is when Sawyer talked about the numbers of creations Picasso, Einstein, and Edison all created throughout their life verses the creations that are notable. This encouraged me to make more things not worrying about it being perfect. It's important to understand that everything that I make is not going to be great, but the more I make the better I will get and I will have a better chance to create something amazing! Something that I want to work on after this course is creating things more often. I want to devote time each week that I can spend creating something not related to my classes. Whether it's a small drawing or a Lego castle I think this would help me to keep my creativity flowing at the same time as reducing my stress. Hopefully, after creating small things for months, I'll have something that I'm proud of. I know that as I create more things it will encourage me to explore new things to create. There are many things that I would like to learn more about, such as video editing, leather work, and circuits. I am looking forward to having time to mess around with some of this stuff over the summer, and I will be sure to make it part of my schedule next semester.
0 Comments
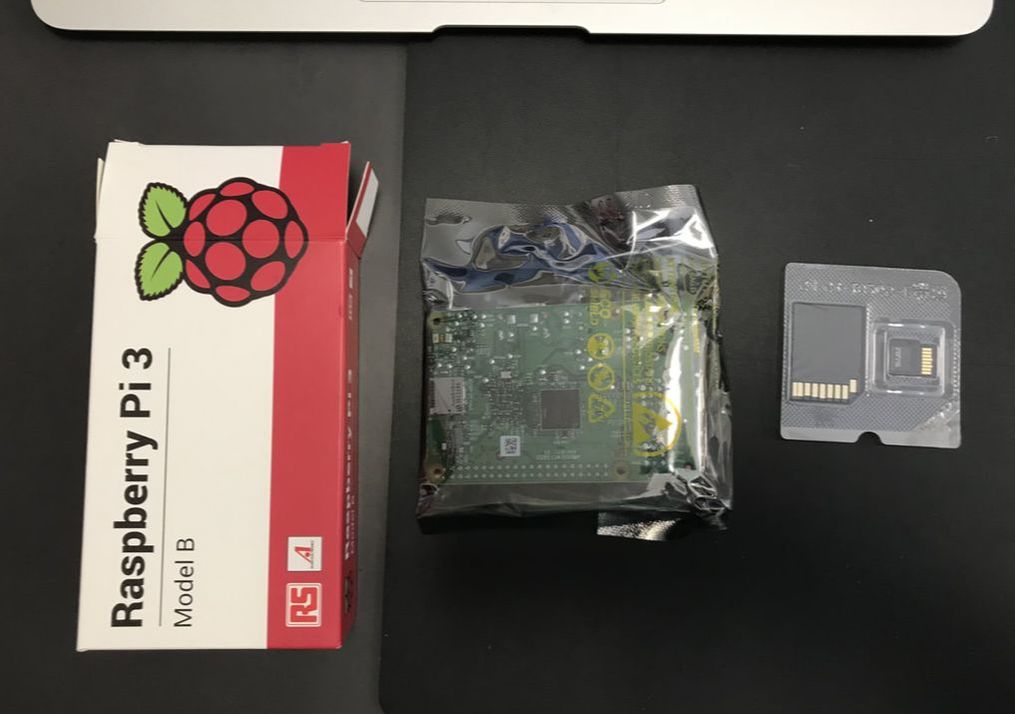
 Now that I've created a working emulator I wanted to document my process to try to help others make it the same way. One of my goals for this project is to be able to teach some kids how to make the game emulator. I know a handful of kids that would be eager to create their own video game station, and I am always glad to encourage STEM and curiosity to these kids. I think this project could be enjoyed by anyone, but I want this tutorial to focus on a kid's perspective. To accomplish this, I want to make a friendly tutorial with many pictures (unlike some of the tutorials I have found). Although it is an important skill to learn to read through blocks of text for the material you need to know, I simply find this more engaging (example page of the tutorial):  I want this tutorial to be clear and concise, yet detailed enough that they should not run into any trouble. Considering that I will facilitating this tutorial, I want to make the tutorial specific to the hardware that we are using - there are many possibilities of how to get RetroPie running. I also don't have enough experience to make a tutorial considering so many different possibilities like some of the other tutorials I have found. This tutorial will only consider the Raspberry Pi 3, using the arcade buttons that I have, and specifically using a MacBook to download everything.
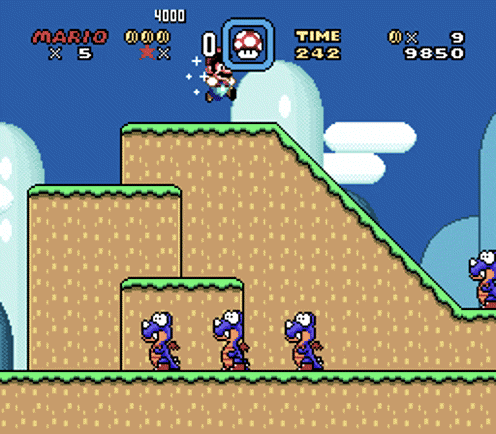
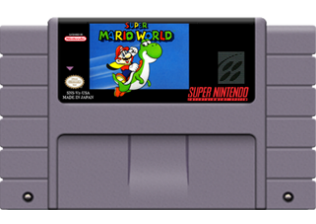
And there's good reason for it - downloading these game roms is illegal . . . sometimes. In order to save any trouble, or any possible blaming, all of these tutorials tend to stray away from showing how to download the roms. There is some misinformation ahead. This is what I found all over the internet about downloading roms. But it turns out this information is wrong, it is in fact illegal to download roms from the internet in any way shape or form. Here is the research I found from all these misconceptions: To stay within the laws of copyright, if you own the physical game you are allowed to download the game on your own or possess the download of the game. You own the rights to play the game, therefore you can use the roms. The problem arises when you are on a website that has roms for nearly every game that was ever made on the Nintendo. If these tutorials were to direct you to one of these websites, then you could easily download any of the thousands of games that you do not own.
This information was all over the internet as I was looking to find out how to legally download the roms. You can check out some examples of this here , here , here , here. From all these sources I was convinced that it is perfectly legal to download the games that you already own . . . but that's not quite true. You are permitted to copy your games' data to keep a backup - but this does not mean you can download these games from any site distributing them online. Here is Nintendo's official statement about the matter:
The confusion is that it does not matter wether you have the game, that never was the problem. Everyone downloading these roms, including myself, thought this misinformation was logical and a good argument to have rights to play the game. But the game player having rights to the game is not the main problem. The main problem is that all those websites mentioned earlier, distributing these games, do not have rights to all these games. These are illegal websites. Not only are they "enabling piracy", but every game they have on the website is pirated - so you can't download any game from them legally. It doesn't matter what games you own, downloading them from the internet will always be pirating. As I was researching more about the actual facts of downloading roms, I found this insightful video on the matter. Rob discusses the legal issues behind downloading these games, but he also brings up some legal options on how to continue using an emulator: As Rob mentioned, there actually are some games that are legal to use on the emulators. On the RetroPie website there is a nice page that points to many places to find legal roms. All of these roms have been released by the game developers to be used free of copyright, in the public domain. There are even a couple other games that still hold their rights on the game, but are open to use on emulators. Once I found out the majority of my project was actually illegal my project came to a hard stop. I did not think there was any way that I could move forward from here. When I started this blog I thought I would just talk about making a tutorial, and how to jump around the rom problem. But this new insight on the problem has changed the direction of my project. I will continue working on the tutorial, but I will need to be sure to carefully explain the rom problem and direct the user to the legal roms. Luckily I don't have to throw out the whole tutorial, but the purpose of the tutorial has changed. I don't find making an emulator for some random space game near as fun as creating it to play Mario Kart, so I probably won't continue to make the handheld emulator. There were other motivations like learning about soldering and 3D printing, but in the end I don't think the end product will be worth the time and money I would have to put into it . . . but I am still excited to teach some kids about making an emulator using the arcade buttons! Just not quite as excited anymore. One last note: I mentioned that many people using these emulators thought this misinformation was logical and a good argument to have rights to play the game. Although being logical does not mean it's legal, it does have other implications. Almost all of the sites that I referenced talked about the morality of using these roms. After talking about the legality, many people are still left unsatisfied, it was easier to believe the old information. There is a general agreement that it is morally upright to download the roms for the games that you do own. But that is a loaded topic that I don't have time to discuss now - I'll save the "Morality vs Legality" question for next week.  (1) https://thumbs.gfycat.com/BlissfulSmallCanine-max-1mb.gif (2) http://ocremix.org/game/98/super-mario-world-snes (3) http://www.retrogameage.com/wp-content/uploads/2017/08/Super_Mario_World-4.png (4) https://i.ytimg.com/vi/dX8TPomp0k8/hqdefault.jpg (5) https://pbs.twimg.com/profile_images/448641554609995776/7Z9Y1XAU_400x400.jpeg (6) https://www.nintendo.com/images/social/fb-400x400.jpg 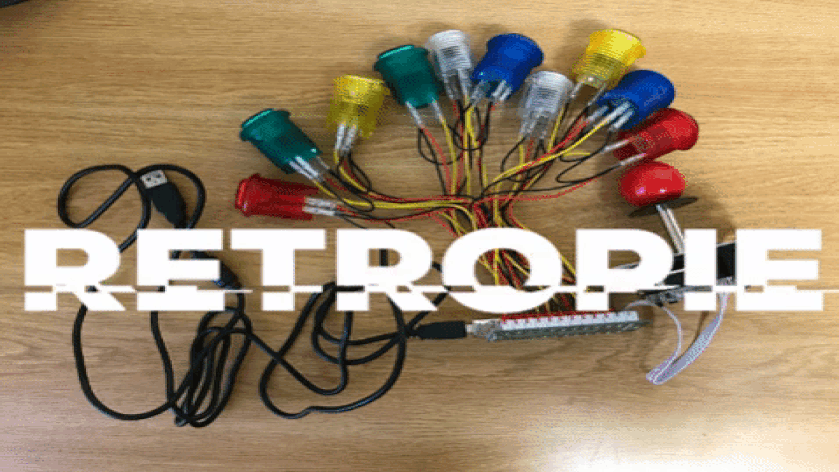 The past couple weeks I have been researching different options to create a game emulator. Initially, I was hoping to get an emulator running on one of Intel's Galileo boards. After hours of research and some communication with someone at Intel, this task seemed much harder than I had initially hoped for. The problem with the Galileo is that it has no native visual capabilities. It's hard to create a game station without a screen! Along with that, there were a couple other issues holding this project back. I could not find any software package that was already made to run games on a Galileo. The Galileo is simply not built to run things like this. As much as I wanted to see this happen, it was out of the scope of this class to actually write software, so I had to turn to plan B.
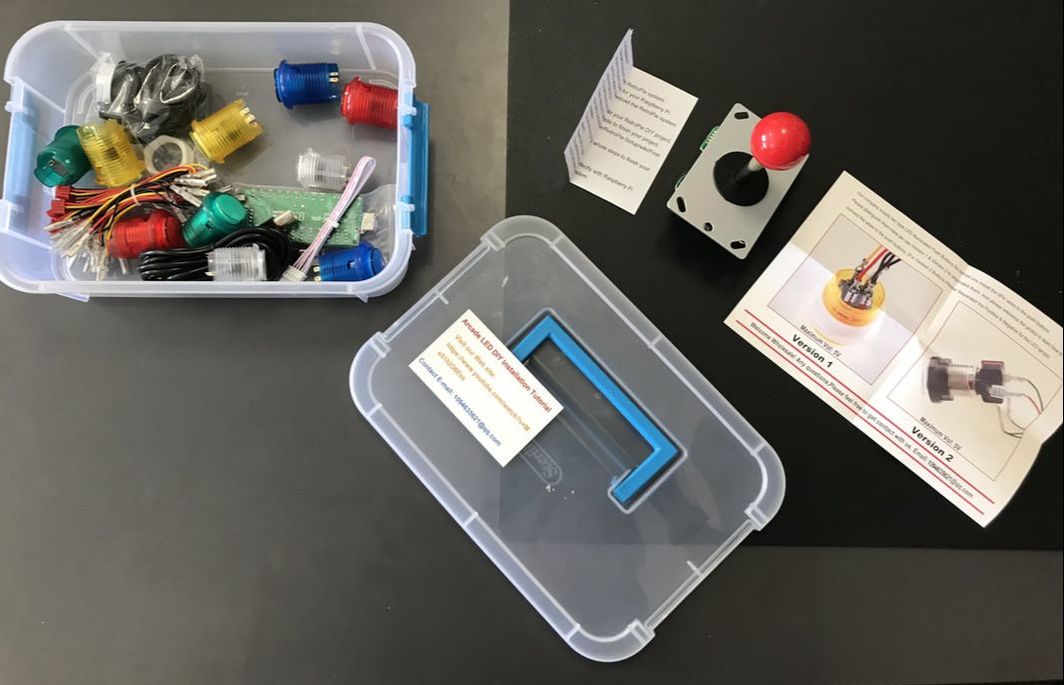
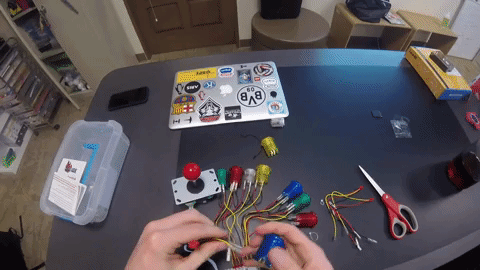
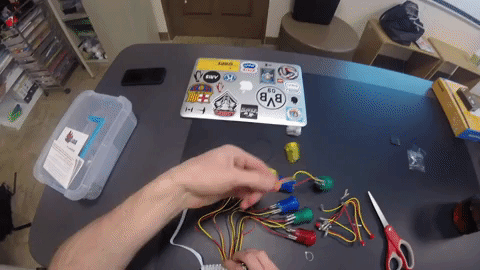
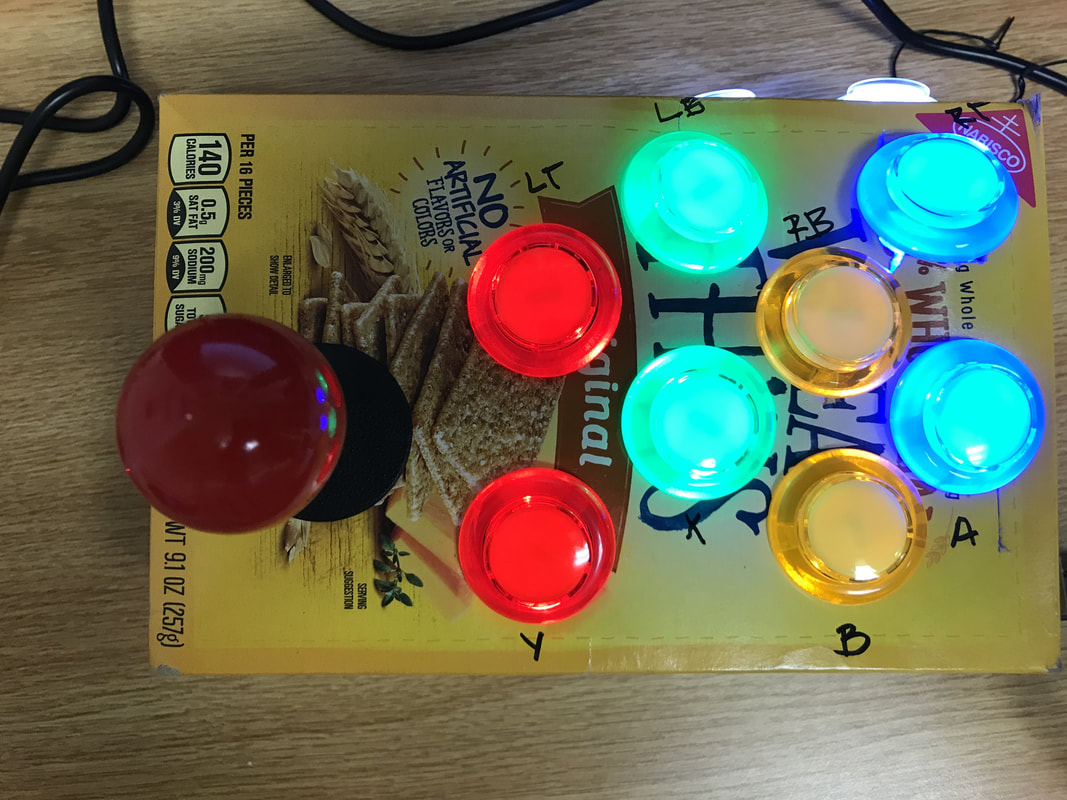
After I got the software downloaded, I started working on making a game controller. Luckily there was a set of buttons and a joy stick sitting in the closet in the lab!
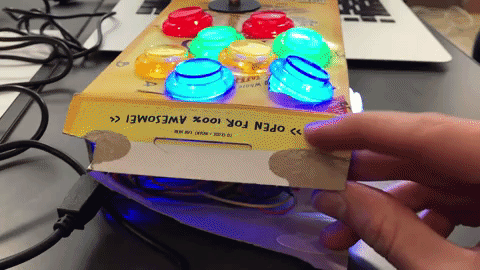
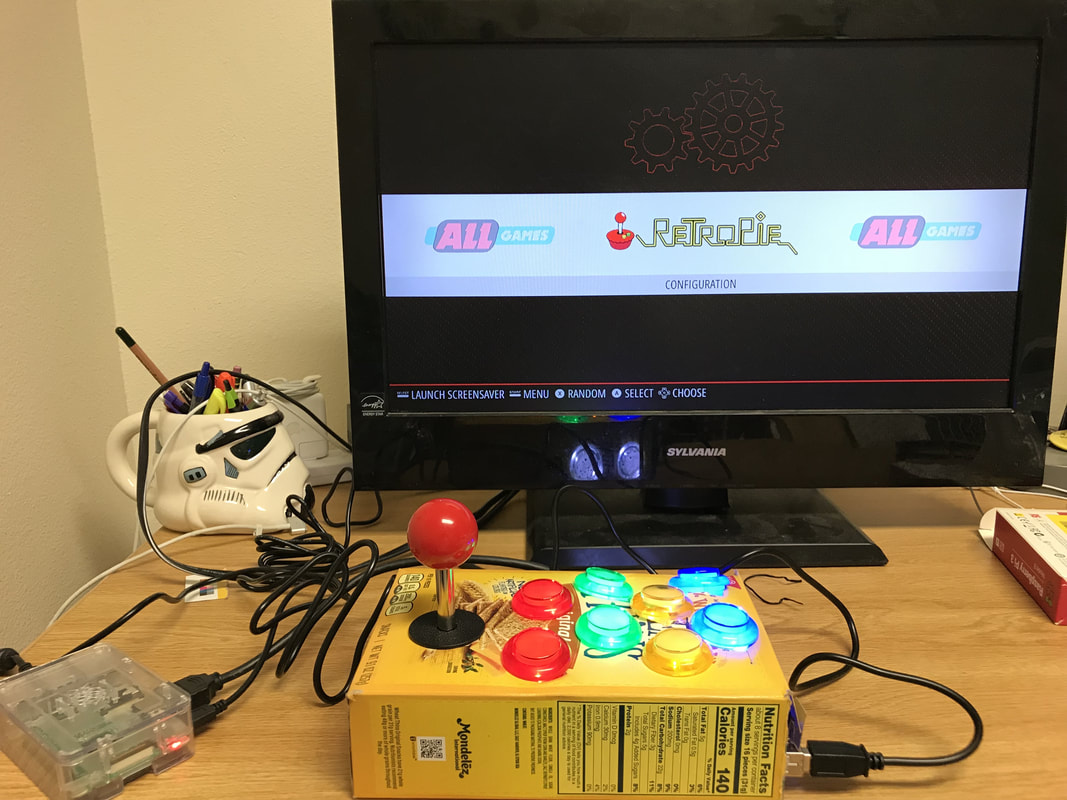
The finished product was quite the mess; it was not a very effective game controller. Nonetheless, it was exciting to see it together. It was not long before I put all the buttons in a cardboard box to hold everything in place. But, before I got to putting that all in a box I wanted to test out RetroPie! One of the best parts about using the Raspberry Pi is the simple video capabilities it has. All I had to do was plug the Raspberry Pi into an HDMI screen and it was up and running. 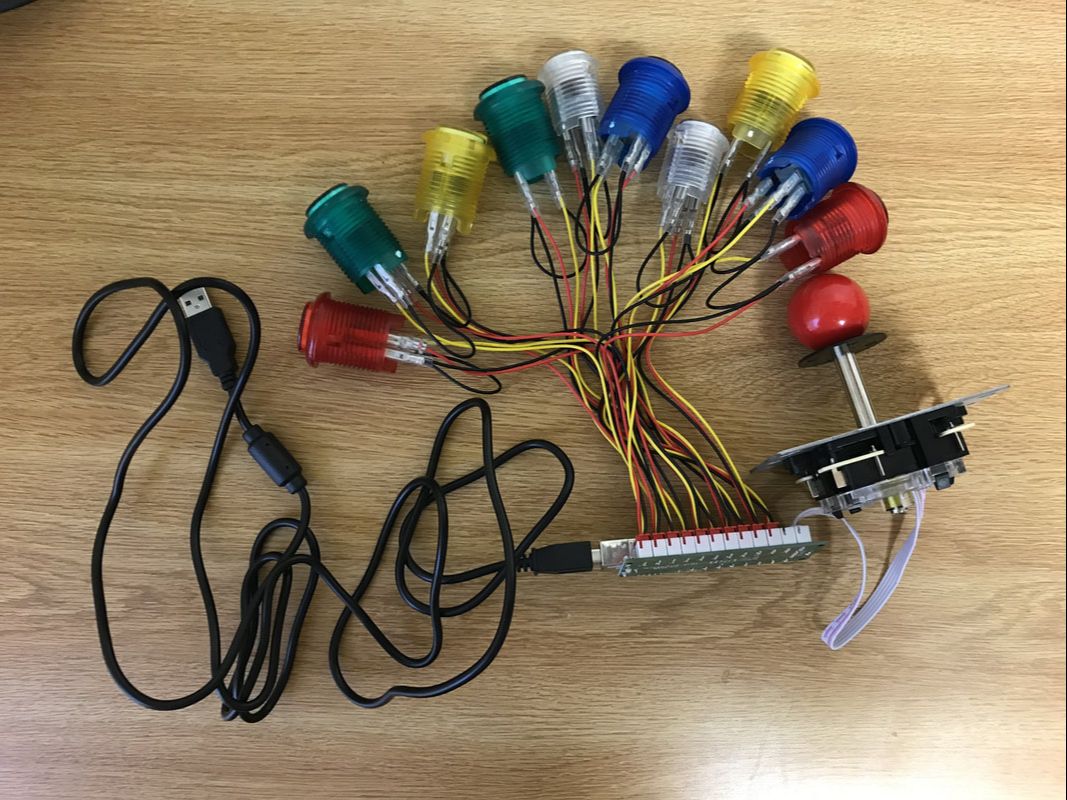 I started to configure the emulator in class using the projector, but I ran into some trouble that kept me from playing the games. As I was downloading the RetroPie software, I found one hole in the tutorial. They took a big leap getting from the download to playing the games, because the games are not initially configured in the package. This was a small hurdle, but I figured it out after doing a couple Google searches. I'll talk more about the actual configuration of the emulator in my next blog post, but for now enjoy this video of me making the game controller!
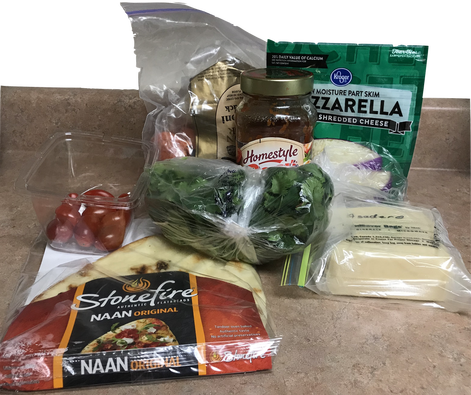
Those big buttons and that joystick are so exciting to use. Maybe in the future I would make something more permanent for them. But they were really just for me to figure out how the Retro Pi software works. In the end of my project, I would like to learn more than about the RetroPie. I want to learn about soldering and 3D printing, as well. My next project is to order smaller components to create a handheld emulator. I would like to be able to take what I have learned from here and apply it to fitting these smaller components into a smaller shell with a screen like a GameBoy. I am already having so much fun with this project and I know that once I start learning about soldering and 3D printing things are only going to get more exciting! 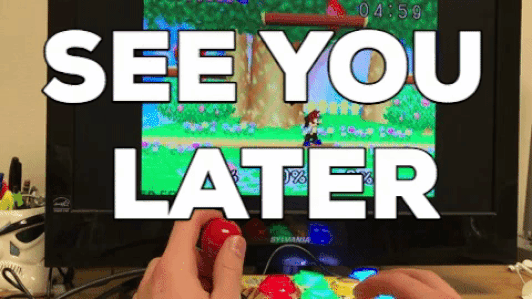  This week I thought I would try something different! When it comes to cooking, I have little experience, and probably not much creativity. I think that in order to be creative in a field like cooking, you first need to have good understanding of the basics. I don't know too much about what flavors I can mix and match. I knew I wasn't ready for anything too ambitious so pizza seemed like a good start! Pizza is everywhere, and in many varying forms. So I figured it would be hard to mess up on this project. I know what a pizza is supposed to be , and if I screw something up it would still be recognizable. The biggest decision I had to make was how to make the crust. I didn't have time to make dough (nor do I know how to), so I got a big piece of pita bread to use as the crust. I also knew that I didn't just want plain, old pepperoni pizza, so I got a couple other ingredients to spice things up. I was excited to see if these different flavors would work together well, After I got all my ingredients together, I was ready to go!
Aside from my love for pizza, my biggest motivator for this project was making a fun video! I have seen plenty of cooking videos online, so I wanted to take a shot at making one. It took a little ingenuity to get the camera set up, and I am pleased with how it turned out! I wanted to make something that looked clean and engaging. One thing that I payed close attention to was the sound of each action that I did in the video. I enjoy the style of video that I ended up creating, I increased the volume of the sound effects so that each action has an added dimension. Check it out: As I don't know much about cooking, I didn't really know what temperature or how long I should be cooking this pizza. But I figured that wouldn't be a problem. I seem to remember a lot of things needing to bake around 350°, so I thought that would be a good temperature.
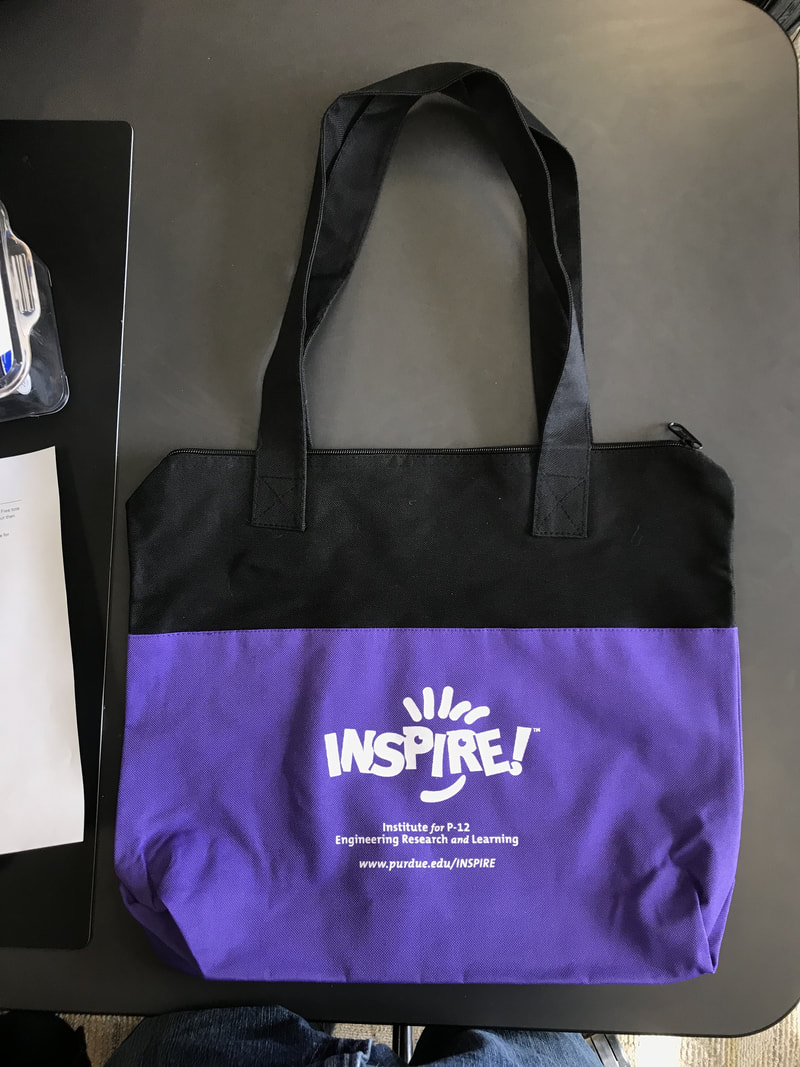
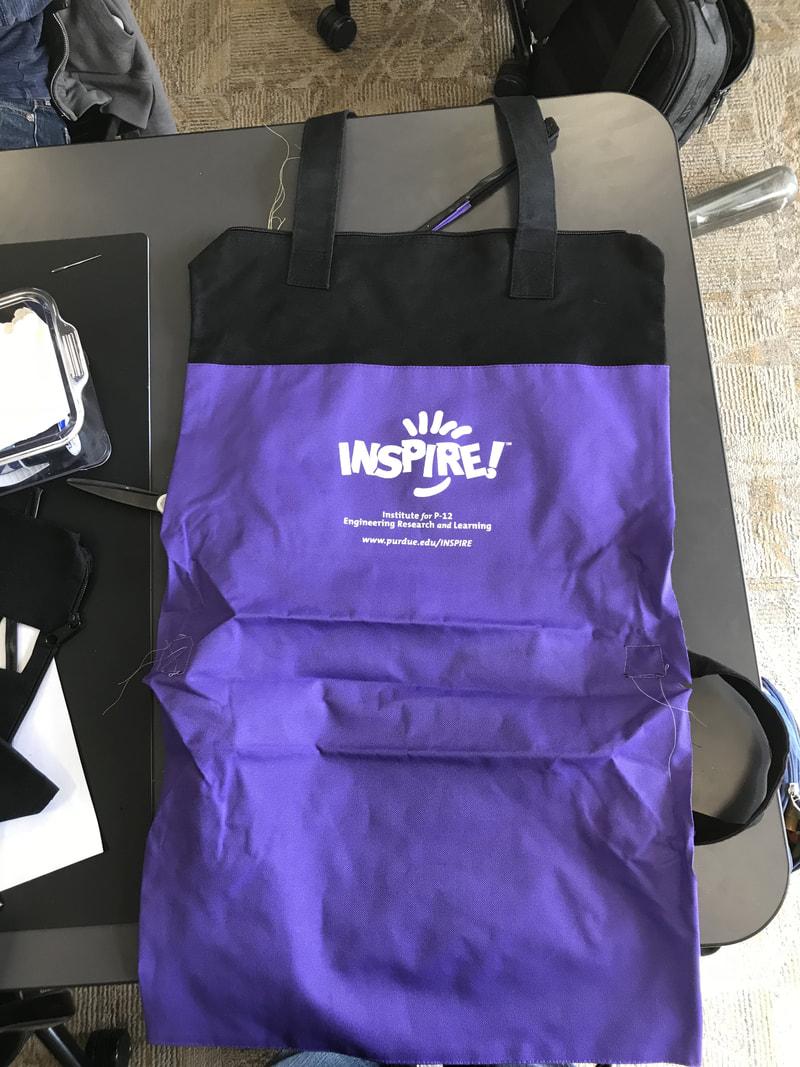
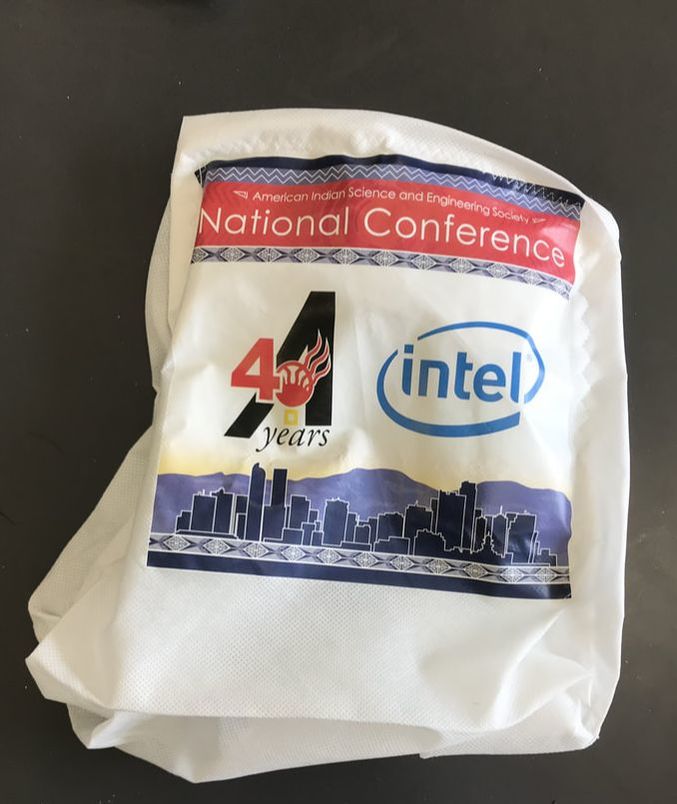
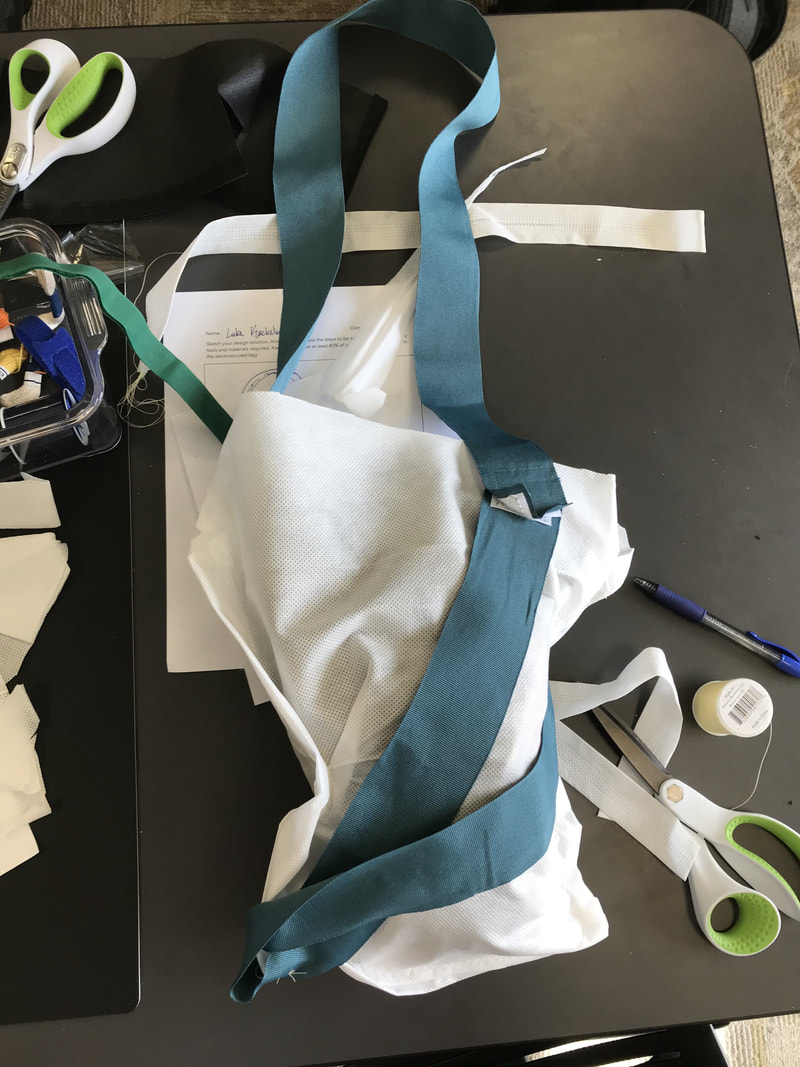
And as I expected it was tasty! Although there isn't too much you could mess up with the pizza, I am always looking to make things better. I think in the future I wouldn't use the same pita bread as the crust. Since it was already cooked it didn't quite cook the way I was expecting, it didn't get crisp like I wanted. I am thinking that this could also be due to the time and temperature that I cooked the pizza. Otherwise I was pleased with the outcome, and enjoyed making the pizza and making the video!  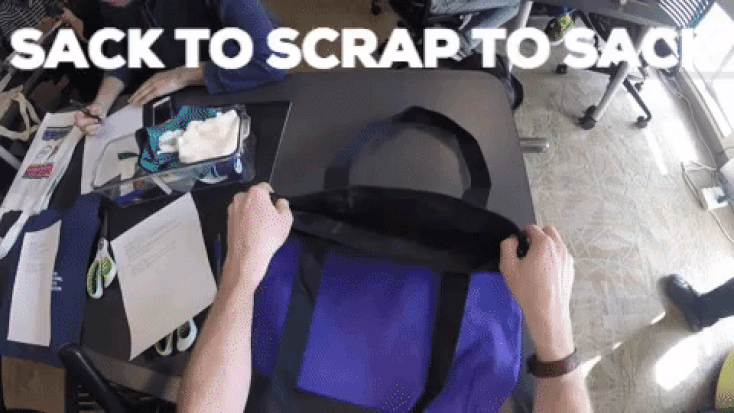 At the beginning of class we were given an old conference bag to deconstruct so that it couldn't hold anything. It was an unusual task, to make something useful into something not. I have never really thought about taking away an object's usefulness. When we were told to to take apart these bags, the first thing I thought is that it could be an apron. At this point there was no "creating" aspect to the assignment, only deconstructing. But I figured that making an apron was still within the lines of making sure it could not hold anything.
After giving the bags a proper send off by making them unusable, we all swapped bags with someone else in the class. The new task was to take what we had and make a functional carrying device again. I had to take this unusable bag and turn it into something that would be able to hold Patrick's jacket and hat. I have had this same problem that Patrick described. I hate having to stuff my backpack with my jacket because it makes it harder to get to other things. Although this bag that I made will probably not permanently solve his problem, I think that it is a useful exercise to help solve someone else's problem. Usually when helping someone they don't start off by hindering your progress, but in this assignment that was different . . . The bag Patrick gave me was totally sown up, with no opening anymore. So I had to find a way to get around this roadblock. After cutting open a new hole, I spent most of the time trying to give it a new strap.
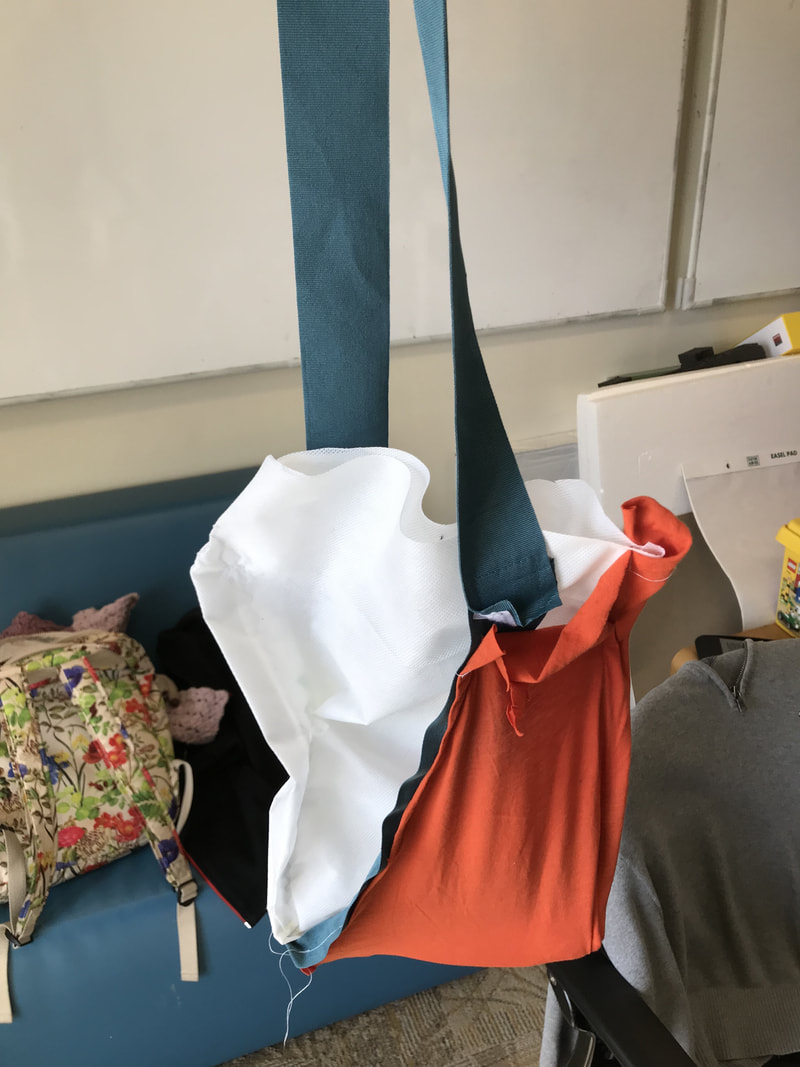
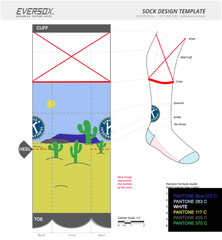
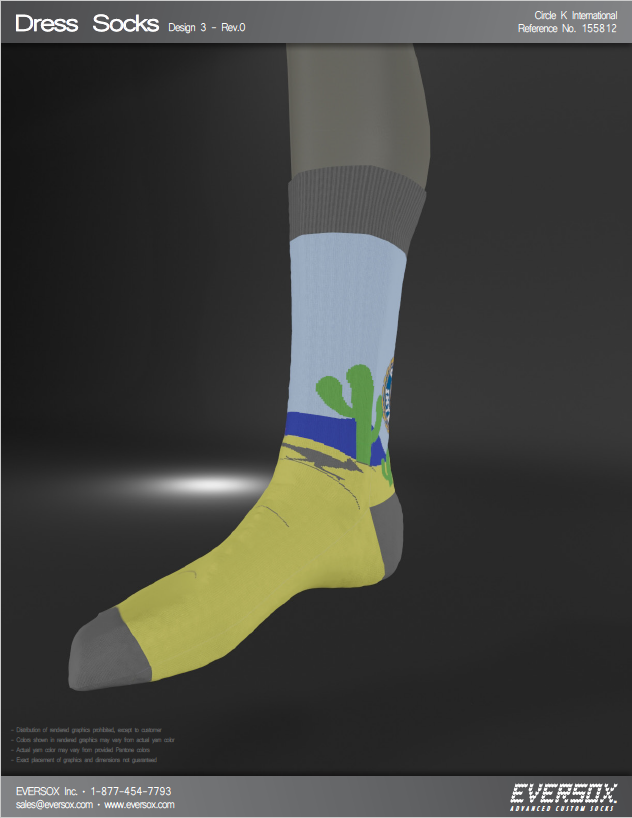
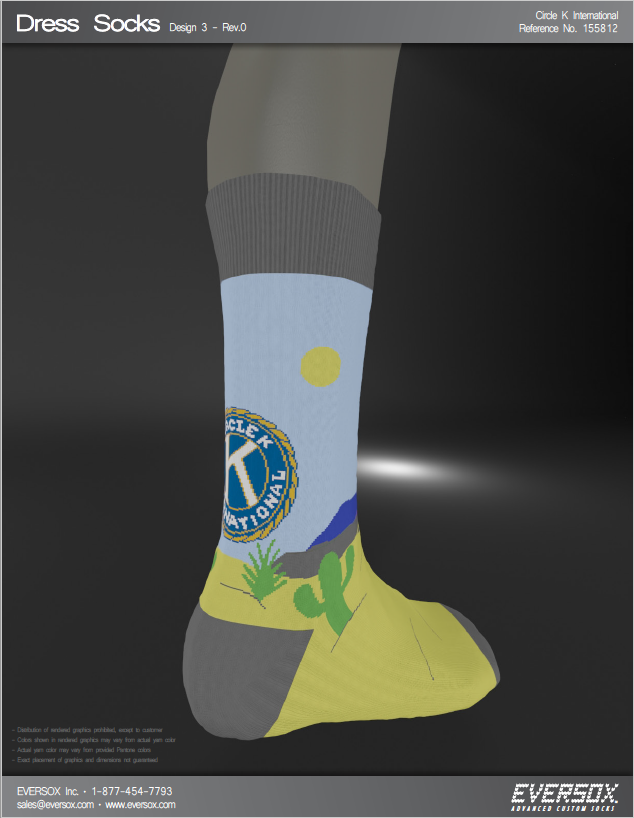
Once I added the straps, I thought that I was all done. But I had only made a bag to fit Patrick's jacket, the hat slipped my mind. So with the little time I had left in class I added another pocket to fit his hat! Check out the video to see me in action: I never thought that I would take apart a bag and reconstruct another in the span of an hour, but I did! The outcome was successful, and Patrick seemed to like it. I also got a new water bottle case at the end of class! The bag Patrick made for me ended up fulfilling more problems than I knew my water bottle had!   Last summer, I got an exciting opportunity to design my own socks! I am a proud member of Circle K International - which is a community service organization associated with Kiwanis. For the last year I have been the Southwest District Fundraising Chair, and my first act as Fundraising Chair was to design some fun CKI themed socks for the district.
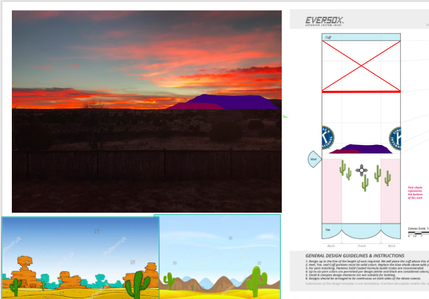
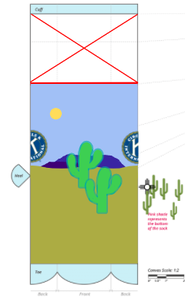
After I was able to get a nice outline of the mesa, I started to add some other Southwest things: cacti, yucca, the Sun, and a roadrunner. It was also important to me that I had the CKI logo showing on the back. I thought that would be neat to see peaking out while people wear them. I also think it's notable to mention that I did this whole design in a Google Drawing. I don't have any experience with making digital art, so I opted for what seemed to be the simplest answer. Although the app had some drawing capabilities, I found it easiest to line everything up with different shaped blocks that they had . . . It probably wasn't the most efficient method, but I knew how to use it to get what I wanted. I found that Google was easy to use and provided the crisp colors that are needed to design something like socks.
After corresponding with the sock company (Eversox) for about a week, we got a design together and ready to order. I was excited to see these digital mockups that they made from my art. It was then just a matter of time before I could see this small dream become a reality!
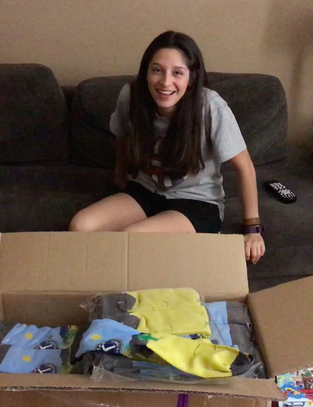
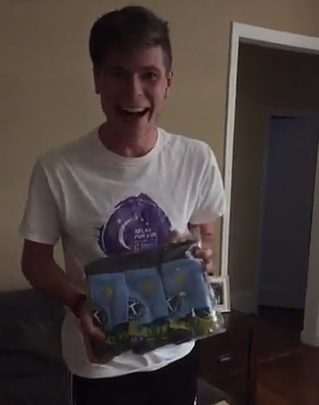
About a month had passed by for the socks to be produced and shipped to my house, but I was already about two months into this creative process. Between searching for the right company, creating the design, proposing it to the district to vote on the fundraiser, and ordering 120 pairs of socks, I ended up learning a couple valuable lessons about product design and business. Creating this product took much more time than I expected and I never could have finished it without the input that I got from other people in the club. Even after all the review that the socks went under, I still look back and think about how they could have been better. Nonetheless, I was thrilled to receive my socks in the mail! And as always, I find that one of the best parts of making things is showing it off, and what better person could I get for that job than my girlfriend. She was supporting me with input through the whole creative process, so I was glad that she could come to watch me open the delivery.
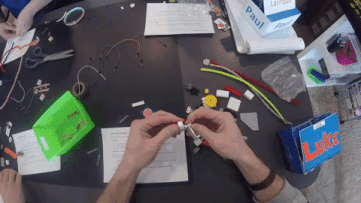
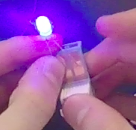
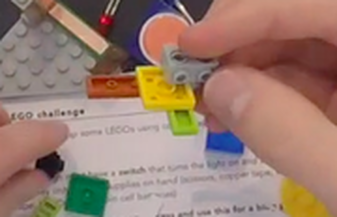
Over the past six months, I have sold over 100 pairs of these socks! I am glad that the fundraiser went so smoothly. And I am also thankful that I got the opportunity to implement a design like this on such a large scale.  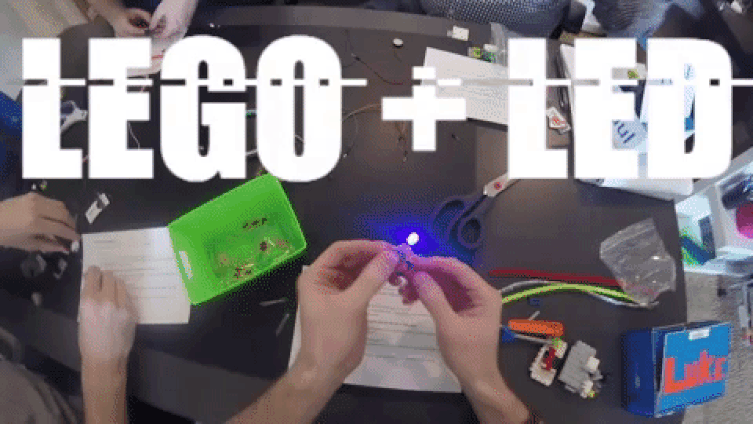 In class, we were given the task to implement LEDs into Legos. Although I have never worked with circuits, I was confident in my knowledge of the way that they work. Along with that knowledge and my long history with Lego, I would consider this project to be in the familiar realm.
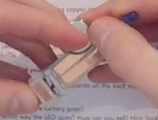
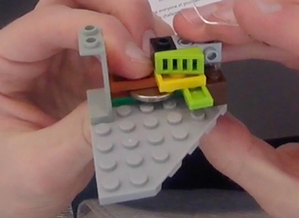
Instead of developing a new switch for the circuit, I decided to plow on without a switch. When I get stuck in a creative task like this, I find it helpful to go work on something else for a bit. It's hard for me to continue cranking away at the same problem over and over, so moving to another section of the build was a useful way to take a break, while continuing the process. I started to create a nice little nook for the battery to sit in the Legos. This also created a surface on both sides of the battery to connect the copper tape. In order to achieve the shape I wanted, I used some fun, unconventional methods to flip the bricks upside down. This was similar to one of the methods on Swooshable (here) that we viewed for an earlier assignment. I was surprisingly satisfied with how well the battery fit into the slot I made; luckily the battery was exactly the height of one Lego plate!
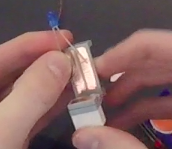
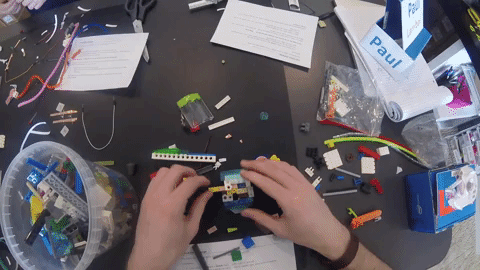
Although class was coming to an end, I wasn't quite ready to wrap-up! At that point, I felt that I had just finished experimenting with the copper tape. Once I had figured out it's possibilities I wanted to take it a step further to create a polished product. Inspired by a blue window piece that I put over the LED earlier in class, I wanted to try to get two lights going together, similar to a police siren. So here's a cool, little montage: This whole project was engaging, yet relaxing for me! I am always excited to get my hands on Legos, and I hope that this is not the last time that I add lights to them! My prior knowledge on ways to configure the the bricks, and my personal interest in Lego helped to promote my curiosity and creativity. I don't know if I would have been quite as ambitious with the lights if I had not known how to fit everything together the first run through. Another aspect of the project that I surprisingly enjoyed, was getting to record it. I have never used a GoPro before, so this was a fun, new experience! I found it interesting to revisit the project from a different perspective; it definitely helped me to analyze some of the strategies that I used in this process. And on a side note, I love montages, so I think that was pretty cool. This project also sparked my interest in circuits, so I may be doing some more with circuits in the future. I understand the basics, but I would be interested in learning more about them and trying to push their limits. 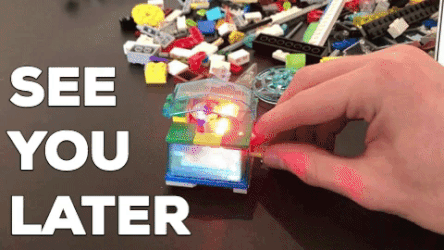 |
Luke Kachelmeier